nikon d70 lessons

Sunday, April 12, 2009

Questions, comments???

Hello all, and thanks for all of your great comments!
Ms. Vain Angel, if you are out there, here is some good news....
Please refer to my new Nikon blog, titled "Steven K. Ramsdell photography", here is the link... http://www.stevenkramsdellphotography.blogspot.com/

I love all of the comments that I have recieved. It seems that a lot of folks have lost or forgotten their manuals. This is too bad indeed, but it is nice to know that I was able to help some people out!

Vain angel wrote,

"Thank GOD for your posts! My manual is in Alabama and I am in Canada and I learned how to shoot with a timer in less then 5 min. because of you blog! I bet if I did read the manual - I would still be sitting here trying to sort it out instead of happy and with a self-portrait :o) Thanks!"

What else can I say? Thanks for your kind words and expect an email from me very soon!

Now, the commercial....

I post about Nikons in general, for several reasons. First, I bet that most of you are just like me and you have upgraded by now. Secondly, more and more readers and Nikon owners can get the information that they desire, instead of only the D-70 owners. The D-70 will forever have a special place in my heart, but there is so much more out there to cover that I could not limit myself to only one camera.

Monday, March 30, 2009

The speed of Sync!

Hello Nikon D70 and D70s users. This is the blog that just will not go away! I have walked away a few times, but your comments just keep me returning.

Wondering what makes you all so special? How about the amazing high speed curtain sync speed of your beloved Nikon D70, just for starters! That is special indeed, as it can go way fast, and it seems to be one of the only Nikon “D series” of cameras to be able to achieve this incredible feat.

What is so special about a fast flash sync speed? Well, a whole bunch of stuff…. First, you can loose all of the ambient light, or available light, in a shot, using a fast shutter speed. The faster the speed of the shutter the less light reaches the image sensor. The Nikon D70 can sync up to a blazing 1/500th of a second. At that speed all of the light cast by the sun will be blocked from entering the camera.

Next, get your flashes out and charged up. Now, with all of the ambient light removed you can add light where you want it. Using light modifiers on your flashes (barn doors, grids, snoots) you can add just a “feather” light in (so many cool ways) your images.

You can shoot directly into a setting sun, for instance, and make it appear to be dusk. Now, add some flash to your set up, and only what receives the light from your flash will be in correct exposure. You can get some dramatic skies this way, and you have the power to stop any motion that is happening too!

Take a look at the images that the link takes you to. The name of the photographer is Tohar Sade, and these images are wonderful! If you look at the portfolio and look at the jumping girl on a beach at sunset, you can see what I want to explain, or at least talk about. He is using this exact process to make the sun appear darker than it actually was. Notice the colors in the sky also! The light from the flash lights up the subject to a perfect exposure. Bravo!

Sunday, December 21, 2008

Back in the saddle again.

To be honest, I have neglected this blog.
I have been working on my newest photo blog, Steven K. Ramsdell photography, WWW.StevenKRamsdellphotography.blogspot.com and I have left you all out in the cold. From all of the ongoing posts to this blog, I must get back on top of this blog.
I feel as if a great big "I am sorry" is due, so I am sorry.
With that said, I have purchased a new set of cameras. I no longer own a D-70, but instead I have a pair of D-200's.
Please feel free to switch over to my new blog. Heck, Nikon stuff is Nikon stuff if you think about it. I will continue to post Nikon D-7o information as I come across it.
Thanks for hanging in there!!!
Steven Kern Ramsdell

Friday, September 01, 2006

Nikon D70s lesson 6

If you have been following these blogs for the Nokon D70 and the Nikon D70s, then get ready for somthing a little aff. We are going to shift gears and dive into some knee deep Photoshop watters.I feel the need to save you folks some time and a lot of money. Are you ready? Get your Nikon D70s out, and your Photoshop up, were blogging!


This is a template based image. As you read you will see how you make a template, and then drag and drop images into them.

Templates: how to use them, and how to make them.

If you find yourself editing images of a similar look, or feel, and you are doing a certain task to most, or all of the images, then you need to use a template. Templates will save you a lot of valuable time, which equals money, when using photoshop to finish a session. Since you do not get paid for setting at your computer, why stay any longer than you have to. You probably could use quite a few different templates in your day to day work flow. If you don’t think that templates will save you time and money right away, then stand by to be WOW’D!
What are templates, and how are the going to save time, and how are they going to make money? For the most part, templates are simply saved actions that you have stored in your computer. They are not images at all. They can be a color correction process that you enjoy using, or as intricate as a crop, vingette, and blur filter combination, or any series of effects limited only by your imagination. Templates contain the part of a finished effect or the part of a finished look that you like to apply to your images, and only that part. I love to use a template that simply inserts my watermark into my images.
A great example of a template would be one that added a vingette to any image that you dragged and dropped into the template. Vingetting is a name for darkening the edges of a photo in order to keep the viewers eyes locked onto the main part of the image, and away from the edges of the image. For the sake of an example, let’s say that you have one hundred vacation photos that you would like to add a vingette to, as they are all horizon shots.
Instead of opening each image separately and then going through the process of adding layers and then adding the vingette to each and every image, you should make a template that already has this certain vingette in it, and then let this new template to do the work.
A template is a blank document, or image, that only consists of a particular edit function in it. Start your own template by opening a blank document in photoshop, making sure to make it a “psd” document. Make sure that it remains a PSD document even as you save it, so that you can always adjust the contents to fit. With this blank image open, make a new layer and add the effect that you are looking to apply to every image in your vacation shots. Now, save this blank image (again, as a psd document) with a title that reflects the effect you applied. Perhaps in this case you would name it “vignette template”. Whatever it is you name it, save it as a template by adding “template” to the title of this psd document. You may also do more than one alteration to your templates, but they will become harder to use as the alterations pile up. Not every picture will need color correction, contrast adjustment, and a Gaussian blur, but these would all make great templates by themselves.

Now this is where the magic happens. Open this newly saved psd image titled “vingette template”, and then open one of your images that you need to apply a vignette to. Now, all you have to do is click on your image to be edited, and drag it into the template! That is it!
Some alterations will probably be needed, and this, too, is a snap. Remember that your template was saved as a psd document? Well, here is why. The psd image can be altered easily due to the fact that the layers are saved in t psd documents. This newly combined image can be adjusted by using the layers until it looks just as you need it. Each layer has one alteration, and you can use the opacity slider and the fill slider to adjust the amount of the layer you want to show.
Save this new image, and be careful to not save your template as a part of this new image. This template can be used time and time again, with only a click and drag of your mouse. How much time will this one template save? Think about all the other templates that are waiting for you to create them!
Now think about working all of these vacation images at once using a batch edit along with your new template.
As an example to apply with this whole article, I found myself editing a bunch of wedding pictures, all from the same wedding. Well, each one of these pictures needed to be edited with a brightness adjustment, a contrast adjustment, and last of all a darkened edge (a vingette) was needed. I opened a blank document and recorded these actions listed above, to separate layers, making them one at a time. Then I saved these layers on this blank document as a template.
This means that I saved it as a psd template document, so I could always go back and alter the layers as needed. I saved it with the name of “wedding template”, so I would recognize it from my list. Now, all I had to do was open this template along with a picture that needed editing, and drag the picture into the template. The complete alteration to every image could now be completed in one session. The amount of time required to edit each image was cut by over 50 percent! Behold the power of templates.
Now you can see how taking a moment and making your own template will save you hours behind your machine, and put dollars into your own pocket.
Check out some of my images at my website, WWW.SteveRamsdell.com, and look for the use of templates!

Have fun designing your templates, and keep an open mind when it comes to what project(s) should be a template. The rule of thumb is if it will save you time and work in the future, make it a template.


Have fun, and keep shooting those pictures!
- Steve Ramsdell


Sunday, August 27, 2006

Lesson five, macro

Nikon d70 and Nikon D70S owners, come here and listen to me. Bold, I know, but that shows in the Nikon d70 blog search, and attention is a good thing, when it is attention to the macro world.
What is macro? Macro is a prefix, like micro, and it means small. Like my blog staff is a macro outfit, or just myself! I bet it means something else that is close to bringing the micro world up to our sight ability.


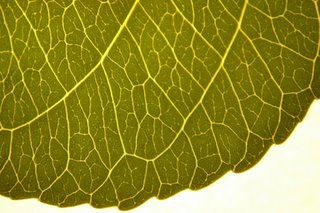
This leaf is not really a macro, but it is close. I shot it with a poorboy light box, and my Nikon D70S, without any fancy macro attachment (which we will discuss in a moment) on my camera.
The depth of field is as you might expect from any shot that you would take using the common 18-70 lens, or a good depth of field for focusing.


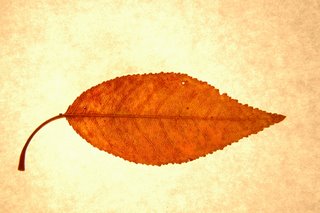
This image is also a leaf, and I would consider this one to be a macro image. This shot was made using a cheap and simple macro filter, which rendered almost no depth of field to speak of.
Lets explain this macro world, and how to get there. The first three ways to macro-ville that I can think of are the macro filter, a bellows system, and perhaps extension tube/rings that go between the camera and the lens. All three will take you where you need to go, but they all take you in different modes of travel.

Here is what I mean. The bellows is a system most used, and preferred by the most, to obtain macro shots. The bellows attach to the camera body and the other end of the bellows attaches to the lens. These things extend like an accordion, by the turning of rather precise dials. These dials bring the object of the image both into focus and larger/smaller. As you focus the bellows it expands or contracts as you set up the shot. These resemble large format cameras with the exception that they do not turn to focus on a plane other than straight on. The bellows is usually attached to a tripod while the camera hangs onto the unit itself.

Next is the macro filter. Yes, a filter! These things look like grandpas glasses, only thicker! These simply screw onto the end of a lens, and magnify whatever they are pointed at. These need the use of a tripod, since any shake is also magnified. These babies have a couple of drawbacks though. One is that the depth of field is as thick as a piece of paper. That is all you get. If you blink, you will miss the point of focus. A second drawback is that the edges of your image may distort slightly. I call this the soda pop bottle effect, but that is not very professional. Depending on the lens that you screw these precious things onto the depth of field increases or decreases, and the power of intesity behaves in direct relationship to the depth of field.

A third way to reveal the macro world to us all with your Nikon D70 and your Nikon D70S is with the use of extension tubes. These act like a bellows system, but without the adjusting capabilities that a bellows offers. For that reason you can buy different lengths of extension tubes, each offerering a greater or a lesser effect. These may be as cheap as the macro filter, and I can't decide which is better. I will say that the filter is faster to put on and to remove.

The only other way that I can advise you to get a macro image is with the use of "macro mode" on the Nikon D70 and the Nikon D70S. I use this mode with the added features of a macro filter, macro bellows, or macro extension tubes, since it helps the camera to better focus close up. This is all that it does, though, but it is better than nothing, right?

until next time, keep shooting, and maybe take a trip to macroville sometime soon. Check out the macros on my site, www.steveramsdell.com , on the links page.

Sunday, August 20, 2006

Nikon D70s lesson 4

Shooting perfectly in Manual mode
The Nikon D70 and the Nikon D70s both share the same settings on the mode dial. The setting that I would like to discuss today is the manual setting, or the “M”. This mode on the Nikon D70s is simply that, when it comes to the F-stop or the shutter speed. The focus system is still the same in its workings.
Once the Nikon camera is placed in the M mode you can see how the image will come out. This is done using the read out in the view finder. By pressing the shutter release half way down you can see the read out just below the image you are shooting. The read out that I am referring to is a bar graph that is read from the center to the left or the right. The center is a perfect shot, when we talk about the under exposed or the over exposed image.
Like I said, when it is centered the image will be fine. If the readout shows bars in either the left or the right than it will be either under or over exposed to the degree of the bars shown. The idea here is to adjust the settings on the Nikon D70 and the Nikon D70s to center the bars to the center, or the perfect image exposure.
The settings that can move the exposure to the center is the shutter speed dial and the F-stop dial. These are both on the right side of the camera, as you hold it. The shutter speed is to the front, and the F-stop is to the back. Watch the bars as you turn either of these dials, and watch as the bars move from one place to another.
The idea here is to set the F-stop where you think it will be best (for the image you are shooting) and then adjust the shutter speed until the bars are in the center of the read out. When it comes to the perfect F-stop one needs to think about the focus elements. What this means is that you must decide if you want the background in focus, or out of focus, in the image that you are shooting. The smaller the F-stop (2.8, 4, 5.6) the thinner the focal plane, or the depth of field, will be. This means that the closest object only will be in focus. The larger the F-stop (22 and so) the larger the depth of field, and everything will be in focus.
So, the ideal shot might look something like this….The Nikon D-70 or the Nikon D-70s is put into manual mode. If you are shooting a portrait of a cute person and you want only this person in focus. You really want to blow out the background out of focus, so you decide to use a small F-stop, perhaps a 5.6 or smaller. Next, look at the read out through the view finder, push the shutter release down half way (while pointing at the subject) and pay attention to where the bars are reading. This is acting as a light meter by the way, which is way cool!
The next thing that you will want to do is adjust the shutter speed (faster or slower as needed) until the bars are centered on the read out. The next thing to look out for is that the shutter speed may be real low (or slow) and you will need to use a tripod, as you know. This is something to look out for, but odds are that you are already using a tripod anyway if you are doing a portrait.
All of this can be done in a second or two, and will be second nature in two shots! This is the best way to get perfect shots, and in more than one way. These ways are that if you use auto mode, you will not get to choose the shutter speed nor the F-stop, so you can’t get the desired effect with relationship to blur. Also, this whole thing works with setting the shutter speed first, then adjusting the F-stop to match.
The Nikon D70 and the Nikon D-70s are sold as completely automatic digital cameras that can do it all for you. But, as you get better and better in the digital photography realm, you will want to change this or that thing in your image. You will want your image either under exposed or over exposed a little, to get a cool effect. The manual mode of the Nikon digital cameras is the fastest and the best all around way to do this. This is just one reason that you will love shooting in the manual mode. You will soon like this better than the auto mode, if you can appreciate a built in light meter!
This is something that you will want to practice for a while to get good at it. Try inside and outside too, because the read out will be a different reading, and it will work slightly different. In the near future I want to talk about the A, S, and the P modes of your Nikon digital camera. Please feel free to read all of my other blogs, which contain lesson 1 through 3, as well as all of my other blogs. My website for photography is http://www.steveramsdell.com/ and my other site is http://www.samedayguitar.com/ , and please be sure to read and enjoy them both! Untill next time, keep shooting!!!!

Wednesday, August 09, 2006

Nikon d70s lesson 3

Welcome back to the Nikon d70 and Nikon D70s lessons. What I try to do is simply share the knowledge of the d70 and the d70s that has been shared with me. This blog will discuss the timer. The Nikon D70s timer is a great way to get a picture with you included. You can set the Nikon d70 on a tripod, set on the timer setting, push the shutter release button, and then still have time to run over and get into the picture. This is great for self portraits, when you are all alone, or with a friend that you want to share an image with.
To use the timer on your Nikon D70, and the Nikon D70s, you must first set it on a tripod. I know that this is a no brainier, but I felt that it had to be written. This enables the camera to remain in place while you scurry around to the front of the camera. Be sure to frame the shot, and make all of the adjustments such as focus.
Now comes the part where you must play with the menu of the Nikon d70s. This is easy as pie, so let's do this!
The manual of the Nikon D70, and the Nikon D70s, explains this on page 105. However, I would love to explain my version of the whole affair. First, turn on your camera, and hold it as if you are about to snap an image. With your left hand, place the mode dial to the "M" mode, or manual mode. This is not the only mode that makes use of the self timer, but I prefer this mode, and I use it a lot. Again, with the left hand, press and hold the button that resembles several pages on top of each other. This is called the shooting mode button. With this button held down, use your right hand to rotate the dial on the back of the Nikon d70 (the side that holds the memory card). The first thing you will notice, in the top most information window, or screen, is a series of symbols. These change as you rotate the dial.
The first is a "S" in a box, then comes the symbol that is the same as the shooting mode button, next is a clock (timer), and this is followed by a timer and a remote underneath it. Last of all is a symbol that is a remote.
The symbol that we are to look for is the clock symbol, or the timer symbol. Once this is seen in the display, let go of the button with your left hand. Now, focus the D70 or D70s by pressing the shutter release half way down. Using manual focus can sometimes save you a headache of the camera focusing over and over. Anyhoo, once it is framed and focused, press the shutter release all of the way down. The Nikon D70 will start to beep and the light in the cameras front will blink in tandem with the beeps. This will become faster as the release gets closer to firing, until "POW" the picture is taken. To shoot another one, you must go through the entire process again. Perhaps a letter or two from all of us Nikonians will alter their mindset, and save us all from this agonizing process?
Next, try a couple of practice shots. Get the feel of how the Nikon d70 runs down the timer, and then triggers the shutter release. Remember that the Nikon camera is digital, so you can practice and delete all day long you get the time down, then it is time to do the real thing.
T see some great self timed portraits, check out my site, and look for a guy on a Harley Davidson, and the image of me with my guitar in the background. www.SteveRamsdell.com